Séance Solution
How It Works
Intended solution path
- Find the 18 border candles, identified by each having two symbols written on the sides of the cups.
- Match the border candles symbol-to-symbol (e.g., connect the two candles with empty squares edge-to-edge). This forms a 5x6 rectangular border with the word START across the top, and ENJOY across the bottom.
- Fill in the remaining candles, using a combination of letter patterns and magnetic attraction/repulsion. The solution for fitting in all the candles so each of the four faces are magnetically attractive is unique, but using the letters to build words will speed things up.
- Read the phrase across all of the candles: START EACH TEALIGHT ENJOY
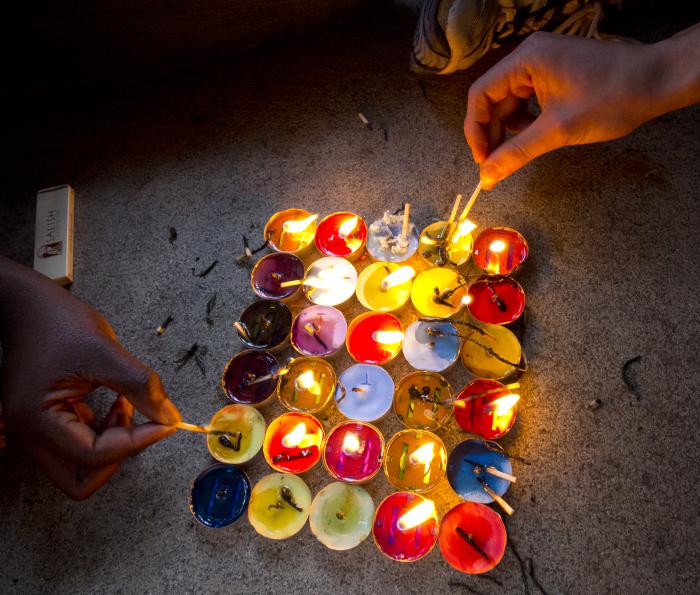
- Follow the phrase's instructions and light each of the candles' wicks (go buy matches or a lighter if the team didn't prepare very well).
- Some of the wicks have been treated to resist burning – they'll be difficult to light and will want to go out once the lighter is pulled away. The rest of the wicks are plain wax-covered string, and tend to burn normally. The result should be six rows of lit/unlit candles.
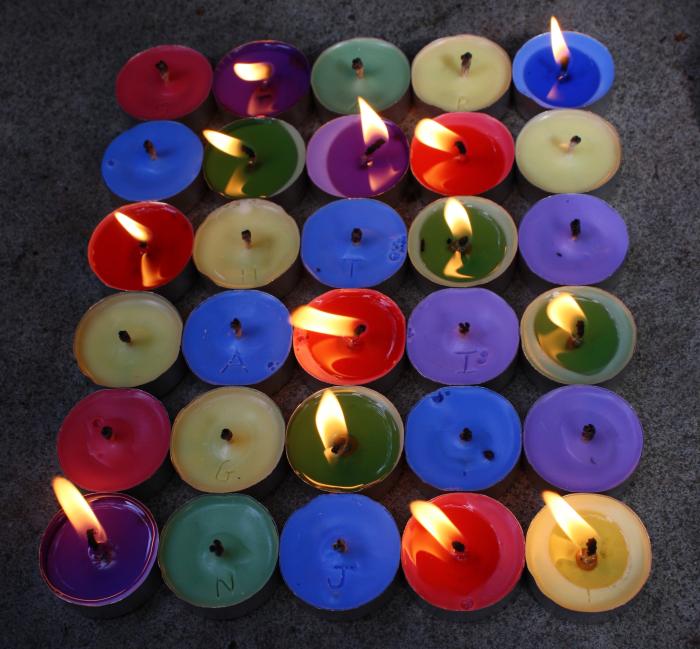
- Treat the rows as 5-bit binary (lit candles = 1, unlit = 0), and treat the resulting numbers as letters: 01001, 01110, 10010, 00101, 00100, 10011 => 9, 14, 18, 5, 4, 19 => INREDS
- Cut open the red candles (blow any lit ones out first!), and find the letters written on the discs holding the magnets. From top to bottom, these spell KINDLE, the final answer to this puzzle.
Solving notes
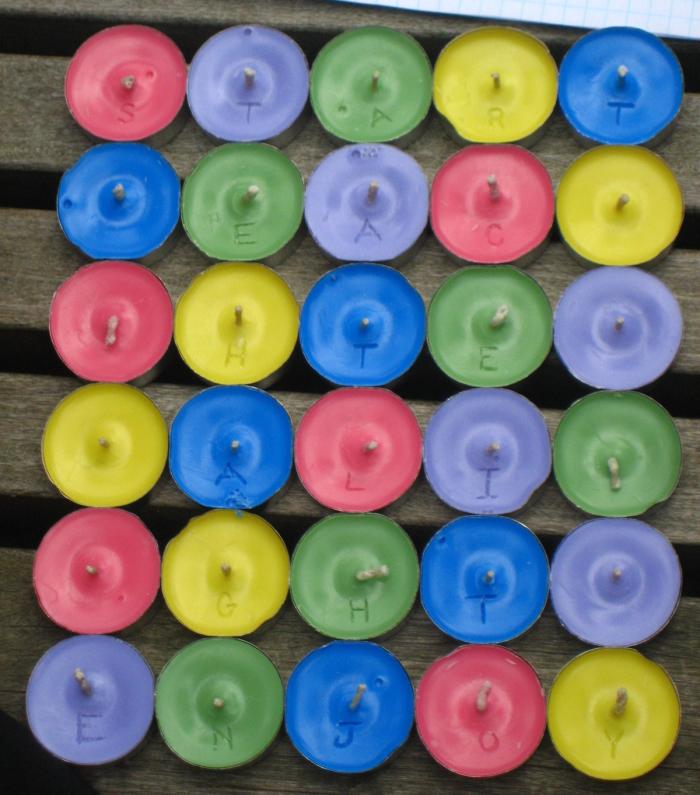
- There's no need to rotate any of the candles. Orientation is given by the edge symbols (for the border candles) and top letters. Exterior letters are all carved into the wax in the same position and orientation.
- Only interior edges have magnets. The outer edges of the border candles are neither attractive nor repulsive. Note that there may be some slight magnetic field on these edges, but it will be orders of magnitude weaker than the interior edges. It should be obvious based on touch – attractive edges physically want to snap themselves together.
- All candles have a letter hidden inside, to obfuscate the real answer. Each of the other sets of 6 colored candles spells a fake answer, and reading the letters in the assembled puzzle left-to-right forms some word-like nonsense.
Assembled puzzle
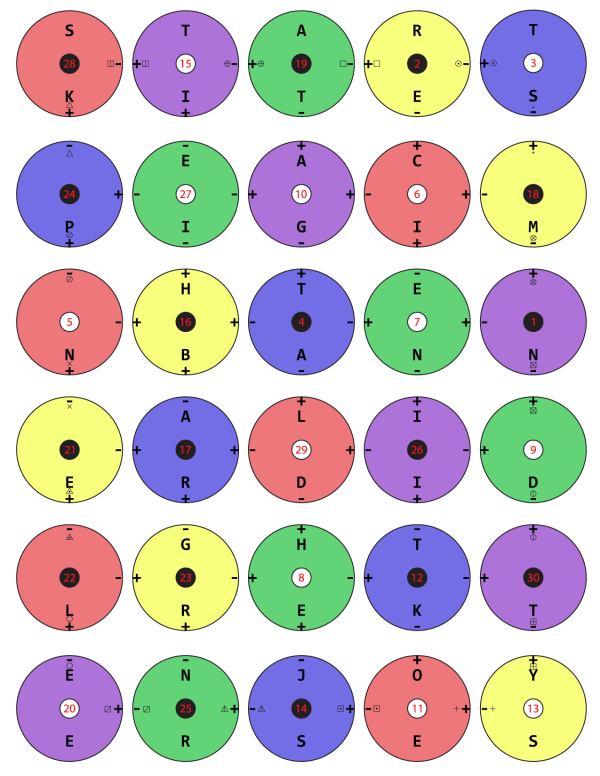
Key
- Color matches the actual color of the wax.
- Top letter is the letter carved into the top of the wax.
- Bottom letter is the letter written on the embedded disc that holds the magnets. This letter is discovered during the last step of the puzzle.
- +/- symbols around the edges indicate the magnet polarity. Polarity is relative, so two edges marked + will repel each other; two edges marked - will also repel; each + edge will attract a - edge.
- Red number in the center is written on the bottom of the cups in permanent marker. Numbers range from 1-30, and are merely used to verify that each puzzle has a complete set of candles. When verifying data, these numbers were used by GC to uniquely identify a particular candle without having to enumerate the other properties.
- Black or White circle in the center indicates which kind of wick each candle has. White wicks will easily burn; black wicks will try and extinguish themselves. The wicks are intended to be similar in appearance, to encourage solving by trying to burn the candles. However, the non-burny wicks are much more rigid than the others, so that could be used if teams have trouble flaming on.
- Funny little symbols adjacent to the +/- marks are written on the sides of the corresponding candles in the indicated positions. There are 18 pairs of unique symbols; each of 18 candles has two of these symbols. A matching pair of symbols will be on the attractive edges of two candles, so matching all 18 will make a loop, giving teams the border.
Solution
KINDLE
Design Notes
This puzzle was originally a hand-off from Ben, who had the initial concept for a puzzle involving tealights with embedded magnets. When Ben got tired of burning himself with too-hot paraffin wax, the idea was nearly tabled until Derek foolishly decided that this puzzle sounded like a fun construction project.
One of the primary design goals was to come up with some property that would only emerge if the candles were lit – otherwise, what's the point in using candles at all. We investigated scent (very difficult to hide in a candle as small as a tealight), temperature-sensative wax dye (expensive, and typically triggers at just slightly above room temperatore), and colored flames (very unreliable, since the wax itself burns a bright yellow) before settling on treating some of the wicks to make them fire-retardant.
At it's heart, we knew the puzzle itself wasn't particularly deep (fairly straightforward assembly, 5-bit binary), but hoped that the novelty of manipulating the actual candles would keep things interesting.
Construction Notes
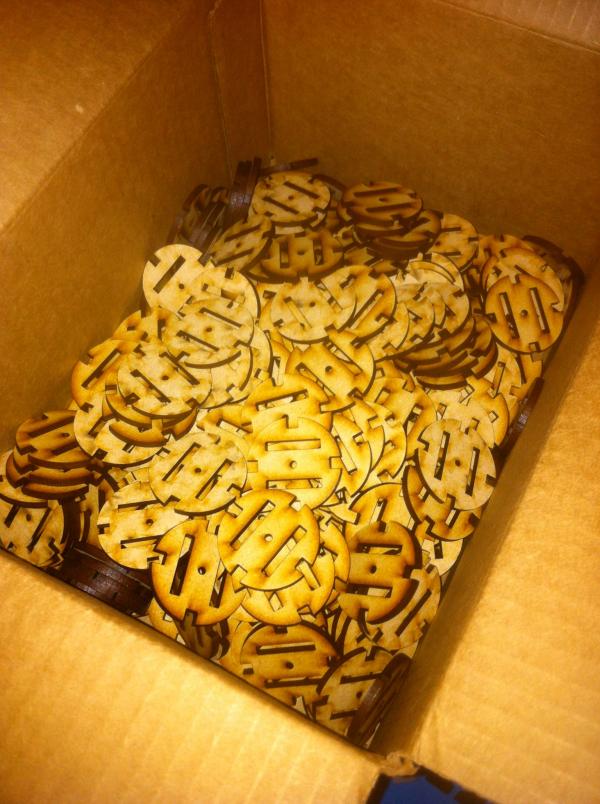
The first batch of candles for the beta test used solid wood discs we had lying around, with the magnets glued on top. The superglue tended to act as a lubricant, causing the magnets to skate around unless they were held in place until they were completely dry. Cutting magnet-sized slots into the edges of the discs solved that problem, although similarly-facing magnets still liked to spin in place to face their friends. Also, the solid wood trapped air underneath when the wax was poured, and the discs would float up out of the candle cups. Two long slots were cut into each disc to prevent that, although bubbles still tended to emerge as the candles set, mucking up the top surface a bit.
20 teams' sets of 30 candles, each with 2-4 magnets meant we had nearly 2000 tiny cubes to super-glue in place. There was about 1% failure rate in the glue joints; the process of stacking the mounting discs together for storage ripped 20 or so of the magnets loose. One more heart attack moment occurred when it came time to pour the wax and we found one of the magnetic cubes stuck to the outside of a neighboring candle cup and had to figure out where it came from and which direction it should be facing.
Next, the sets of 30 magnet holders were arranged into the solved puzzle configuration. This let us verify that the magnets had been glued into the correct holders in the proper orientation, and the resulting letters written on the holders matched the construction diagram. Here is where the previously-mentioned weak glue joints were discovered and repaired.
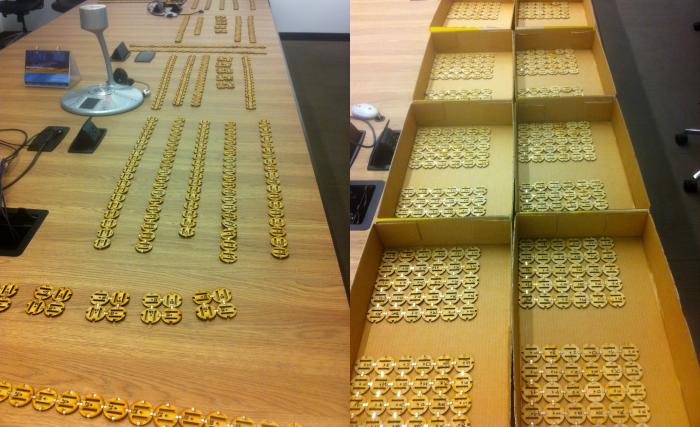
The subsequent task required removing the wax from 600 store-bought tealights and collecting and labeling the aluminum cups. These cups are only slightly less fragile than kitchen-grade aluminum foil, so a fairly delicate hand was required.
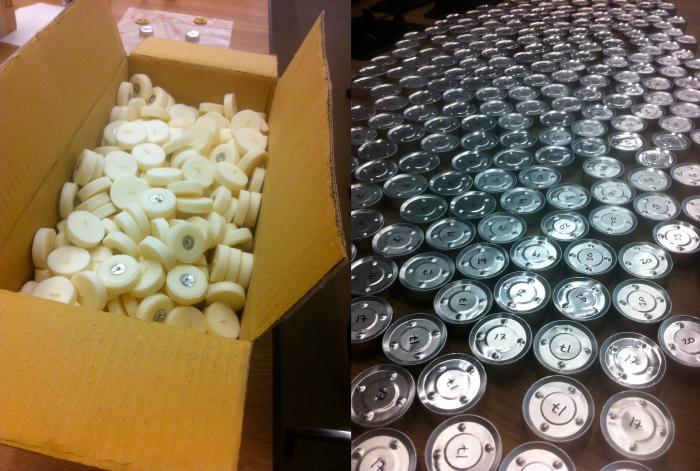
In this configuration, the holders were pressed into cups, and the wicks were glued into place. Each wick needed to be 1-1.5" long. Leaving some room for error, nearly 100 feet of cotton string was first treated with a boric acid+table salt solution, dried, and then given a second bath in either sodium silicate as a flame retardant or plain melted wax. The string got cut roughly to length, and glued into the center of each holder with a dab of hot glue. Both the cups and holders were extremely fragile up until this stage – once the holders were pressed into their cups, the cups would help keep the magnets from loosening.
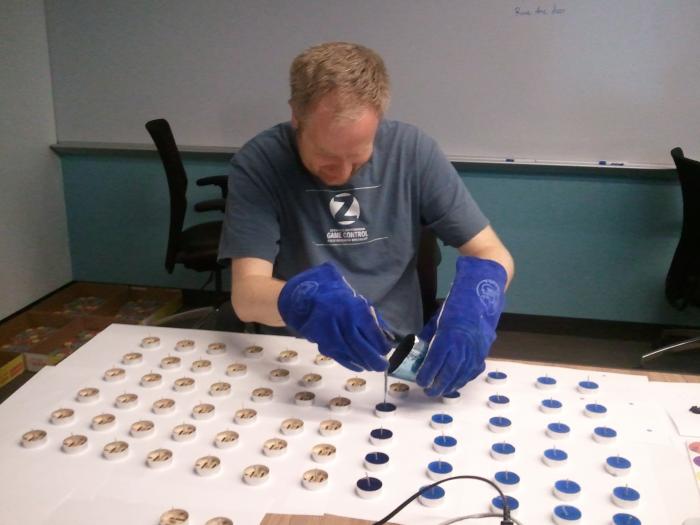
At this point, the candles were ready for wax pouring, one color at a time. The puzzle sets were broken back apart and arranged by color. Since the amount of dye could vary from one batch to the next, each set of 6 within a single set was kept together, so the colors would match. We reused the uncolored wax salvaged from the original tealights. With the volume taken up by the magnets and holders, 9 or 10 wax pucks was enough to fill 2 sets, or 12 candles. As luck would have it, this amount of wax fits nicely in a soda can with the top snipped off to form a makeshift double-boiler. With two cans cooking at a time, repeating 10 times, each color finished in about 2 hours.
Much frustration occurred during the beta learning how wax poured differently than water. Being much more viscous than water, trying to handle too much in the can at once lead to significant spillage. I initially thought I'd be smart by snapping sets of the candles together and taking advantage of the spillage, performing the sloppy bartender pour straight down the line. What this wound up accomplishing was surrounding each cup with a bunch of molten wax that slowed the cure time, and left behind a huge mess to clean off the outside of each candle. For the final version, a controlled pour of only 12 candles per batch proved to be more effective.
After the wax cooled, the requisite candles received letters carved into their tops. Christine was crazy good at this step, and completed the vast majority of the sets before anyone else had done even one.
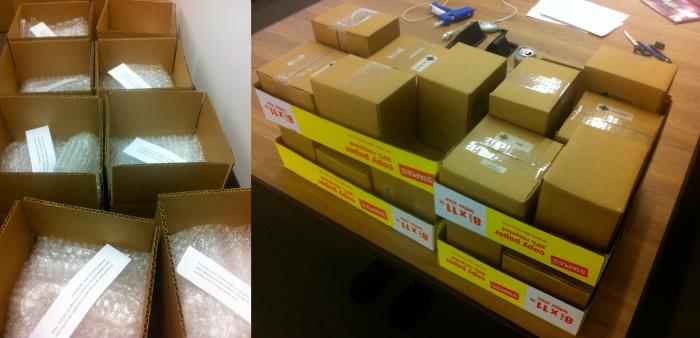
Any remaining spilled wax was then cleaned off the outsides of the candle cups, and the border candles were labeled in permanent marker with the proper symbols. The sets of candles then got shuffled back into 1-30 order, packed into boxes, sealed and labeled for delivery to the teams.
GC Notes
Storing candles inside a hot car parked in the sun leads to melted wax. Unfortunately some of the candles were damaged and the surface letters unreadable as a result. A call to GC supplied the missing letters for affected teams.
Fireproofing cotton + wax isn't 100% effective. While the sodium silicate treatment worked amazingly well against modest attempts to light the candles, teams using more aggressive methods could eventually catch anything on fire. It didn't help that a passing rain shower made the normal wicks similarly difficult to ignite, for those that couldn't find suitable cover to work under.
Some teams lit the candles and then waited for them to melt completely, possibly expecting something else to occur. We originally considered having fully-melted candles be a part of the puzzle, since wax goes from opaque to transparent as it melts, but the requirement of a 30-45 minute wait was too much to work around. Whenever a team waiting for the candles to melt called GC, we responded with something like, "whatever the candles are going to do, they're already doing it."